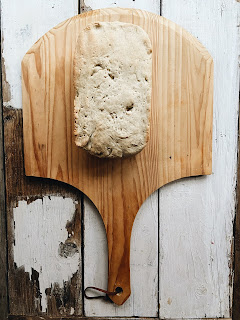
Homemade Gluten Free Bread
Gluten Free • Nut Free • Dairy Free • Egg Free
Homemade Gluten Free Bread
Practically Perfect In Every Way
Bake time: 51 minutes
Proof time: 1hr 30min
Total Time: about 2hr 20min
Bake temperature: 350℉
Recipe:
- 2 cups warm water
- ½ cup white sugar
- 1 ½ tbsp fast acting dry yeast (1 and ½ packets)
- 2 tsp salt
- ¼ cup olive oil (or vegetable oil)
- 4-5 cups all purpose gluten-free flour (if in a moist environment add more flour)
Tip:
My favorite Gluten Free flour to use is Bob’s Red Mill Gluten Free 1-to-1 Baking Flour
https://www.bobsredmill.com/gluten-free-1-to-1-baking-flour.html
Note: Whenever using Gluten Free flour make sure you use a 1:1 ratio. This mean for 1 cup flour you use 1 cup Gluten Free Flour.
steps :
- In a large glass bowl, dissolve the sugar in warm water. Once dissolved, mix in the yeast. Let proof for 15-20min. The yeast should look like a circle of creamy foam.
- Mix in the salt and oil and slowly add in the flour one cup at a time. Note: the dough should still be wet and sticky but pliable. A test is to put your hand into the dough to feel it. If it sticks to your hand then add more flour (only small bits at a time). If the dough looks dry and is not mixing well into a dough then add water (one tsp at a time).
- Knead the dough for 5+ min on a cutting board. Put the kneaded dough in a well oiled glass bowl and turn the dough to coat in the oil. You want it to be fully coated. Then cover the bowl with a wet towel. Let proof for 1 hour. You want the dough to be about double in size. Tip: I put the bowl into the oven on the proof setting. If you do not have a proof setting on your oven, just let sit for an hour but know that if you are in a cooler environment you will have to let your dough proof for a longer time. The cold prevents the dough from effectively rising. So using the proof button is a really easy and simple way to proof.
- After the dough has proofed for an hour, you will punch the dough down and knead for one minute (You don't want to knead for too long or else you won't get a good rise).
- Next you will put your dough into an oiled bread pan (9inx5in). Let proof for another 30+minutes in the oven on proof.
- Now it is time to Bake! Turn on the oven to 350℉ and let bake for 51 min (45-51min depending on where you are at). The sides should just be getting golden but know with GF flour the Bread won't brown as much as with wheat flour. Wheat:Golden::Rice:White.
- Once the bread is done you will want to let it cool for at least 5min before serving. Homemade bread is best eaten the day of.
Bonne journée du pain!
-happy bread day
This bake is one of our great family favorites (especially Mom's)! This bake is usually eaten in a day: half as "tasters" and the other half as just eating. Bread is a slow bake but totally worth the time! This is by far one of my favorite things to bake! While the bread is proofing, I get to make coffee, read, and watch "The Great British Baking Show" (or another one of my favorite shows or movies)! I hope you all enjoy this practically perfect in every way homemade bread bake!
Love,
Moriyah


Comments
Post a Comment
Thank you so much for reading and following along on our family's journey! I'd love to hear from you!